Legato finger movement (also called “slow finger technique”) is not actually made by slow moving fingers - they’re just not moving fast. To properly execute it you must:
1) Move your fingers farther than normal away from the clarinet
2) Move your fingers first in the opposite direction - up before you go down (best done with an arch at the top), and squeezing down before you go up.
3) Maintaining a consistent finger speed
4) Follow through with your movement
5) Visualize. Some helpful visualizations are a clarinet made of nerf, sponge, warm chocolate, or any other soft material.
It is important to watch your fingers while learning this technique. Of course, maintaining proper air support, speed, and consistency, is key to legato fingers, as it is to any technique on the clarinet.
To get the idea of the movement required and to work on follow-through, practice without the clarinet, moving your fingers, one at a time, back and forth from full extension to your palm with a gentle, relaxed motion of moderate speed.
Fingers alone
Then try it out on the clarinet with the same finger (I recommend starting with the middle or ring finger of the right hand) Visualize that the clarinet is not there and your down movement is the same. Just let the clarinet stop your finger as you press into it. Then relax your pressing and hold in position. To go up, first press in, then use the motion from pressing to not-pressing as your speed to continue moving off the clarinet. Throughout both up and down motions, you can think of the clarinet as made of spongy material.
With the Clarinet
Common problems:
1) Moving too slow, producing a portamento.
2) Moving too slow, then at the last second moving very quickly, to produce a slap onto the clarinet.
It is important not to rush through the steps of learning legato fingers. Only after completely mastering a step should you go on. This may take up to a week of daily practice.
Once you have the basic motion under your complete control, go to exercise #1. It is important to separate the up motion and the down motion, practicing them separately. Hence the fermatas.
Compare excercise #1: Fast fingers vs. Legato Fingers.
(explanations continued after music)
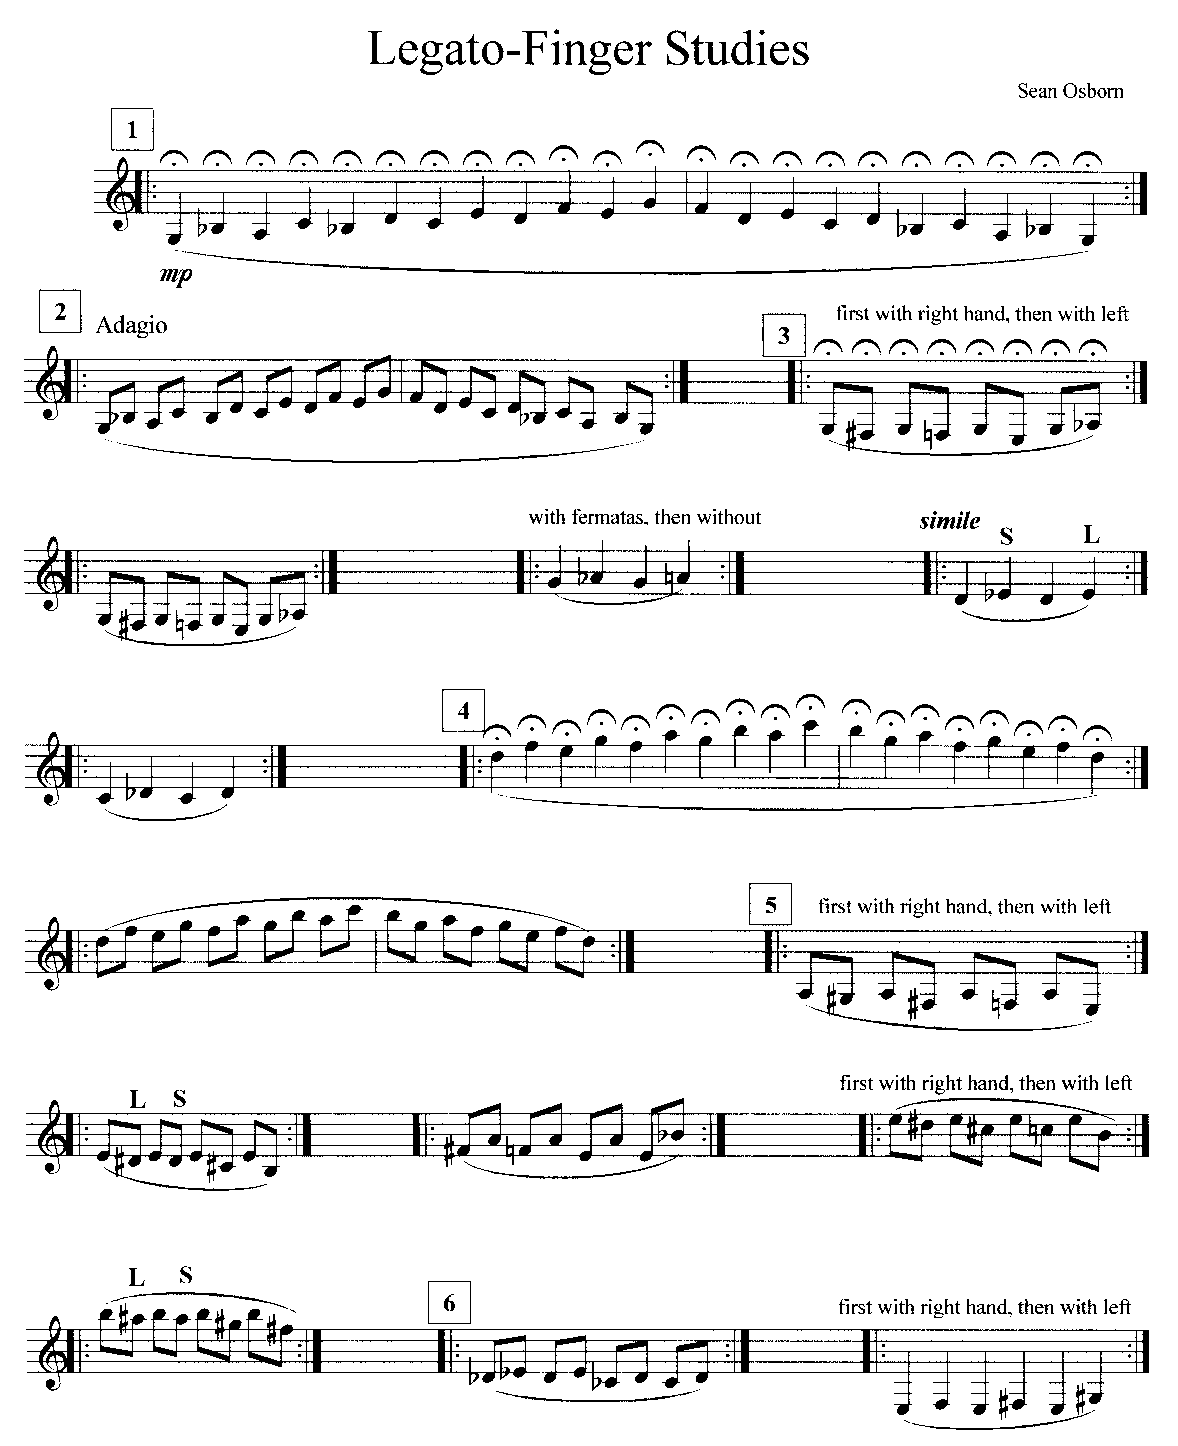
After mastering the up and down motion on the rings of exercise #1, combine the two motions with excercise #2. Make the first up from G-Bb, and at the top, instead of holding, move in an arc and go right back down. As you press into the clarinet on the down, relax your pressure, and come off the clarinet at the same speed that you un-pressed. From here out, all exercises through #6 should be done first with fermatas, then without fermatas and at various speeds.
Exercise #3 isolates movements to keys, where you don’t have the spongy nature of your fingers on wood, but the slappy nature of the pads. Here, visualization and consistent speed are key. Keep you speed regular between the time you move up to go down, then touch the key, then close the key. Likewise maintain consistency between pressing down to go up, moving the key up as you lessen your pressure, and finally having your finger leave the key. Notice the difference between pressing a key to open it, and pressing a key to close it.
#4 begins study in the upper register, where your fingers must be even smoother.
#5 combines similar movements with ring-and-key combinations
#6 focuses on moving two fingers in opposite directions at the same time.
Again I say, do not go from one exercise to the next until you have completely mastered the one you are on.
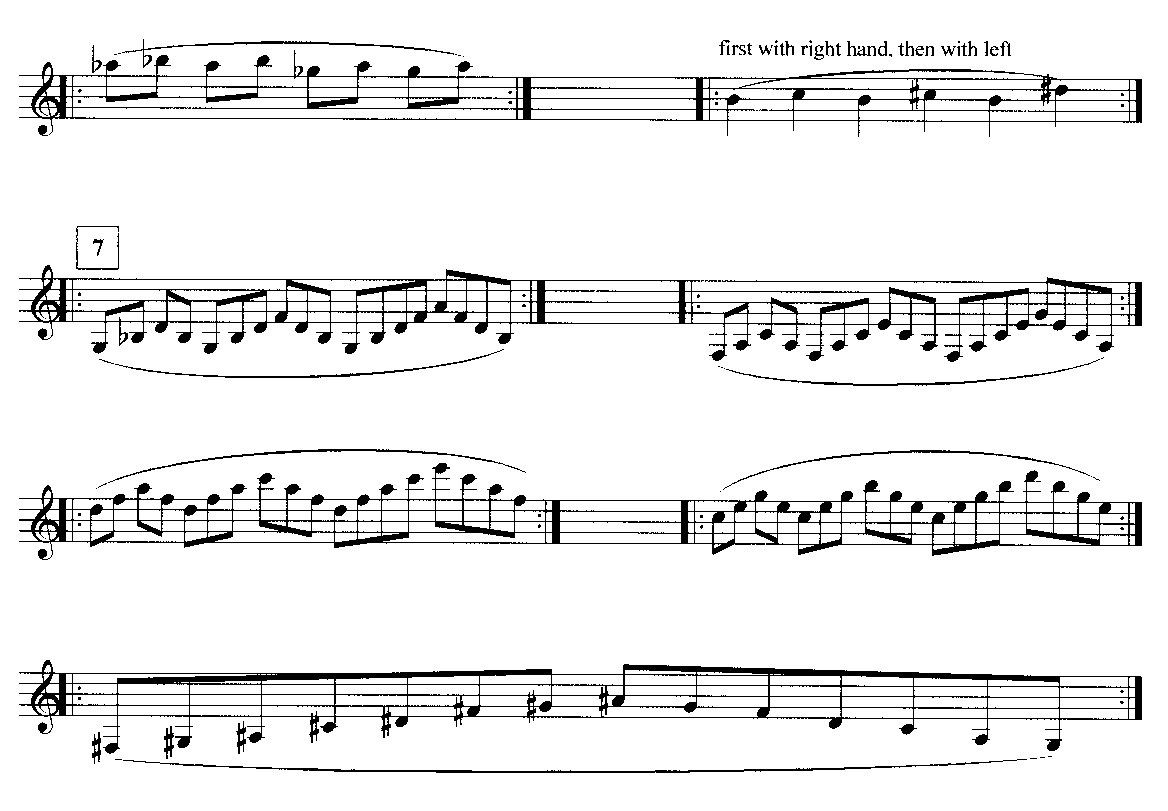
Finally, with exercise #7 we do more than alternate. Moving up or down the scale or arpeggio for more than one note requires more fluidity. Visualize a form of movement in your head, like a gliding bird, and see your fingers moving along that line, in one wave. When moving up the arpeggios, you will not be able to press in with each interval after the first (unless you play the passage extremely slowly), so you must continue the upward motion of your first two fingers smoothly transferred to your next two fingers, moving all of your fingers in one wave. Likewise, when going down you will not have time to go up first before heading down, so move your fingers in a wave down, co-ordinating the transfer of gentle, relaxed motion from one pair to the next. It is also good to practice scales with this step. If you are having trouble with #7, practice it again with fermatas.
The final step is to apply legato fingers to every interval on the clarinet through the use of the Abato Studies.